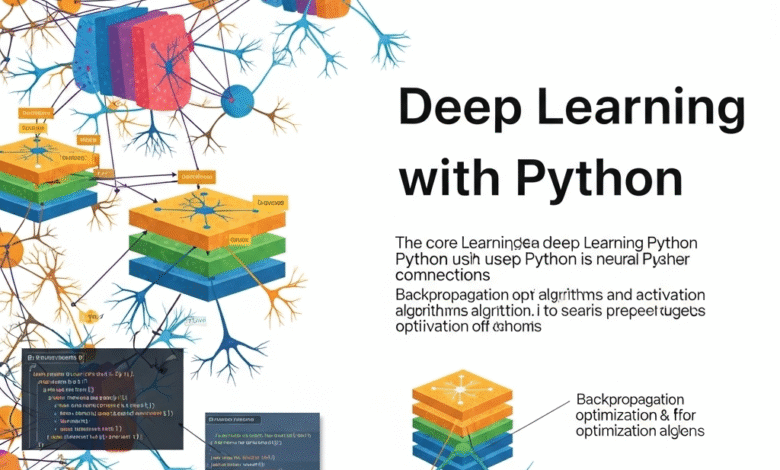
Deep Learning with Python : Building Artificial Intelligence is Like Making Coffee!
Hello Digital Friends! 🌟 Have you ever wanted to create an AI that can:
🎨 Draw paintings from text (“elephant astronaut on the moon”)
🔍 Translate languages in real-time
🚗 Drive autonomous cars
💬 Chat like a human, just like ChatGPT
The secret behind all of this is Deep Learning with Python – a magical combination that transforms simple code into super intelligence! Don’t worry… you don’t need a PhD to get started. Let’s explore this world of digital neurons in a relaxed and practical way!
“What is Deep Learning? Why Use Python?” Imagine deep learning as an artificial brain inspired by the way humans think. Meanwhile, Python is the friendliest language to “talk” to this brain. Why Python?
5 Reasons Python is the King of Deep Learning:
- Simple Syntax: Like English (if, for, import)
- Strong Library Ecosystem: TensorFlow, PyTorch, Keras – all the “AI toys” are available
- Large Community: 15 million+ developers ready to help on Stack Overflow
- Multiplatform: Runs on Windows, Mac, Linux, and even mobile!
- Free & Open Source: No need to pay for expensive licenses
💡 Fun Fact: 92% of deep learning projects in the industry use Python (Source: KDnuggets 2024)!
Essential Tools for Deep Learning with Python: Your Super Toolbox
-
TensorFlow (Google)
- Cool Features:
- Production-ready (Instagram uses this!)
- TensorBoard for training visualization
- TF Lite for mobile/IoT
python5 linesClick to expand
import tensorflow as tfmodel = tf.keras.Sequential([… - Cool Features:
-
PyTorch (Meta/Facebook)
- Cool Features:
- Dynamic computation graph (flexible for research)
- Easy integration with other Python libraries
- Popular in academia (70% of AI papers use this)
python6 linesClick to expand
import torchmodel = torch.nn.Sequential(… - Cool Features:
-
Keras (User -Friendly API)
- Cool Features:
- Like “working with Lego” – build models layer by layer
- Suitable for beginners to experts
python3 linesClick to expand
from keras.models import Sequentialmodel = Sequential()… - Cool Features:
-
Important Supporters:
- NumPy: Super-fast matrix calculator
- Pandas: Data cleaning & analysis
- Matplotlib/Seaborn: Data visualization
- OpenCV: Image/video processing
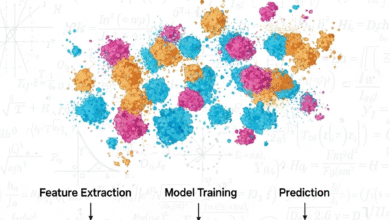
Deep Learning Workflow: From Zero to Hero in 6 Steps
Step 1: Prepare the Data (The Fuel for AI)
-
Popular Dataset Sources:
- Kaggle (www.kaggle.com/datasets)
- TensorFlow Datasets (tfds.load(‘mnist’))
- Hugging Face Datasets
-
Important Techniques:
- Normalization (change pixel values from 0-255 to 0-1)
- One-Hot Encoding (categorical labels)
- Data Augmentation (rotate/darken images for variation)
Step 2: Design the Network Architecture
- Example CNN for image classification: python7 lines
Click to expand
model = Sequential([Conv2D(32, (3,3), activation=’relu’, input_shape=(28,28,1)),…
Step 3: Training – The “Learning” Process
Click to expand
Step 4: Evaluation & Debugging
- Essential Tools:
- Confusion matrix
- ROC curve
- Learning curve analysis
python2 linesClick to expand
test_loss, test_acc = model.evaluate(test_images, test_labels)print(f’Test Accuracy: {test_acc*100:.2f}%’)
Step 5: Hyperparameter Tuning
-
Parameters Often Optimized:
- Learning rate
- Number of layers/neuron
- Batch size
- Activation functions
-
Automation Tools:
- Keras Tuner
- Optuna
- Ray Tune
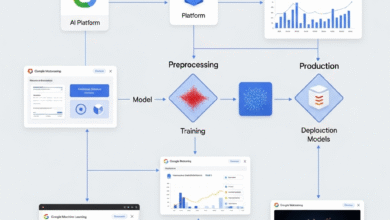
Step 6: Deployment to the Real World
- Deployment Options:
- Web App (Flask/Django + TensorFlow.js)
- Mobile (TensorFlow Lite)
- Cloud (AWS SageMaker, Google AI Platform)
- Edge Devices (Raspberry Pi + Coral TPU)
Inspiration Projects for Beginners
| Project | Library | Dataset | Skill Level |
|---|---|---|---|
| Handwritten Digit Classification | Keras | MNIST | 🌱 Beginner |
| Real-time Object Detection | PyTorch/YOLO | COCO | 🌿 Intermediate |
| Shakespeare Text Generator | TensorFlow | Shakespeare TXT | 🌳 Advanced |
| Facial Emotion Recognition | OpenCV + TF | FER2013 | 🌿 Intermediate |
| Personal Chatbot | PyTorch/HuggingFace | Custom Q&A | 🌳 Advanced |
Example Code Snippet (Beginner):
Click to expand
Common Challenges & Smart Solutions
-
“Loss Isn’t Decreasing!”
- Solution: Lower the learning rate, change the optimizer, add layers
-
“Overfitting Starting!”
- Solution: Add Dropout layers, use regularization (L1/L2), augment data
-
“Training Takes Too Long!”
- Solution: Use GPU (free Colab!), reduce batch size, use mixed precision
-
“Model is Making Terrible Predictions”
- Solution: Check data distribution, analyze misclassifications, add more data
The Future of Deep Learning with Python
-
Generative AI Revolution
- Tools: Stable Diffusion (images), GPT-4 (text), AudioCraft (audio)
python4 linesClick to expand
# Generate images with Diffusersfrom diffusers import StableDiffusionPipeline… -
On-device AI
- TensorFlow Lite for mobile, MediaPipe for real-time
-
AutoML & No-Code AI
- Google AutoML, Hugging Face AutoTrain
-
Neuro-Symbolic AI
- Combine deep learning with symbolic logic
-
Quantum Machine Learning
- Libraries: TensorFlow Quantum, PennyLane
Career in Deep Learning: Where to Start? 6-Month Learning Roadmap:
- Month 1-2: Basic Python + NumPy/Pandas
- Month 3: Basic Machine Learning (scikit-learn)
- Month 4: Deep Learning theory + Keras practice
- Month 5: Specialization (Computer Vision/NLP)
- Month 6: Build portfolio projects + deploy
Popular Job Roles:
- Deep Learning Engineer (Salary Rp 18-35 million/month)
- AI Research Scientist
- Computer Vision Specialist
- NLP Engineer
Conclusion: AI is No Longer Magic, But Code You Can Write! Deep Learning with Python has democratized artificial intelligence. With:
💻 A regular laptop + internet access
🐍 The human-friendly Python language
🧠 Advanced libraries (TensorFlow/PyTorch)
📚 Free learning resources (Kaggle, YouTube, GitHub)
You can build AI that once only existed in sci-fi movies! Remember:
“Even AI experts once typed print(“Hello World”) for the first time.”
Actionable Tips:
- Install Anaconda (anaconda.com) today
- Go to Kaggle.com → Choose a simple dataset
- Follow the “MNIST with Keras” tutorial
- Share your results on LinkedIn!
🚀 Fun Fact: The first deep learning code you write might only be 10 lines – but it’s as powerful as AI from 2010!
FAQ (Beginner Questions)
Q: Do I need a GPU to learn deep learning?
A: Not mandatory! Use Google Colab (free GPU) or Kaggle Notebook. For small projects, a CPU is sufficient.
Q: Which is better: TensorFlow or PyTorch?
A:
- TensorFlow: Best for production & deployment
- PyTorch: Best for research & flexibility
- Beginners: Start with Keras (runs on top of TensorFlow)
Q: How long does it take to become proficient in deep learning?
A: With consistent learning of 10 hours/week:
- 1 month: Understand basics + create first model
- 3 months: Build simple projects
- 6 months: Ready for internship/junior role
Q: Do I need to be good at math?
A: No! Understand intuitive concepts (gradient = direction down the mountain, layer = feature filter). Mathematical details can be learned along the way.
Q: What are the best free resources?
A:
- Courses: Andrew Ng (DeepLearning.AI)
- Books: “Deep Learning with Python” (François Chollet)
- Practice: Kaggle Courses + TensorFlow Tutorials
Let’s start your AI journey! ✨
Have your first deep learning project? Share your experience in the comments — let’s inspire each other! Have questions? Feel free to ask, our expert team is ready to help 😊
“The best time to plant a tree was 20 years ago. The second best time is now.”
- Start your deep learning journey today!